The Lost Files of Sherlock Holmes - Walkthrough
THE LOST FILES OF SHERLOCK HOLMES can rightfully compete with games like MONKEY ISLAND II or INDIANA JONES IV. The scenario is based on the globally renowned stories of Sir Arthur Conan Doyle. The computer version is a real treat for Sherlock Holmes enthusiasts. Fortunately, the game does not have a minimized set of control icons - and that's a plus.
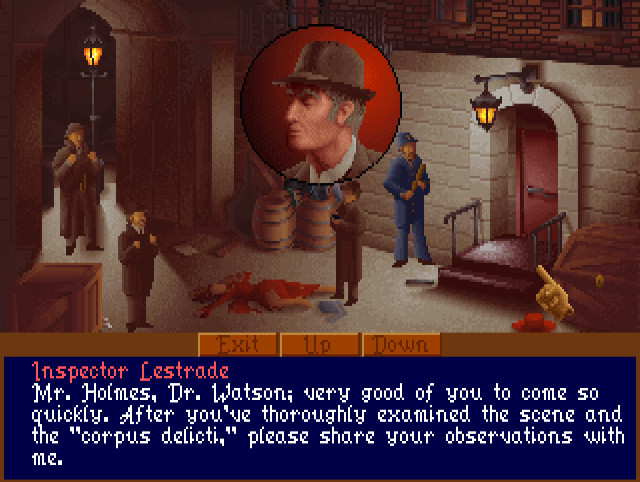
In the alley behind the theater, a young woman was brutally murdered. The modus operandi points to the infamous Jack the Ripper, known throughout London as a murderer and rapist. However, Scotland Yard has its doubts. Inspector Lestrade sends you a letter asking for your involvement in the case.
For ambitious players as well as those who use ready-made solutions, here are a few exploitative tips:
- Before you start talking to anyone, observe the interlocutor and examine the surroundings carefully. This will help Holmes use his extraordinary deduction skills, expanding the conversation topics.
- Continue the dialogue until you exhaust all possibilities; if the interlocutor stops talking, try to continue the conversation.
- Pay close attention to all found items; many of them conceal other objects or unexpectedly provide clues for what to do next.
- Frequently converse with your friend, Dr. Watson; he often gives valuable advice.
Go to the crime scene. Pick up the cigarette butt. Examine the bodies and individual wounds. Take a sample of white powder and a steel rod. Ask Watson for his opinion on the murder weapon. Point out to Inspector Lestrade that Jack the Ripper could not have been the murderer because the scalpel used had a serrated blade. Enter the back of the theater. Examine the stain on the door. Retrieve the spring from under the cabinet. Take the perfume, flower, and dedication note. Ask Watson for a sedative for Sheila Parker and talk to her. Then, approach Henry. Give him the spring so he can fix the door mechanism.
Go to the deceased's apartment. Approach the laundry basket. Take out and examine the rugby uniform. You can open the tube at the head of the bed. Take the key hidden in the umbrella. It's time to return to Baker Street. In the laboratory, examine the white powder and flower petals. Send the boy in front of the house, Wiggins, to find out where in the city flowers dyed with iodine solution are sold.
Now go to the perfumery. Ask the owner about the man who recently bought Eau de Seine perfume. Describe that he uses hair gel, is very tall, and has black hair. Then ask for l'Acofe d'Azour perfume. While Belle is looking for the merchandise in the back, take the cleaner. By now, Wiggins should have information on where to go. Talk to the florist and buy flowers from Leslie. Ask about the man who recently bought pink carnations. Show the girl the dedication note, and she will remember who it's about. Take the wire basket and use it to fish the chain out of the barrel.
Enter the pub. Pick up the feather from the floor and talk to the bartender. He will recognize the chain as belonging to a customer named Blackwood. To extract valuable information from him, challenge him to a darts game. However, you must first show that you can play and beat three regulars at the pub. Go to the tobacco shop. Conversation with the attendant will reveal that the owner, Mr. Bradley, is absent. Ask the boy about the leatherworker. Move the crates with Cuban cigars under the stuffed moose. Tilt it slightly and read the address.
At the leather workshop, you will find a knife, possibly the murder weapon. Talk to the master and ask about Blackwood. He will point out the area of the city. Ask Watson for advice; he will suggest using the services of a familiar bloodhound, Toby. Check the alley where Sara was murdered again. It turns out that the body was taken to the morgue. Ask the prosecutor about Miss Carroway's personal belongings. Proper permission is needed. Inspector Gregson will advise you to visit Lestrade. The vigilant policeman will not let you into Scotland Yard due to new, stringent regulations. Return to the morgue and ask Gregson to let you in. In Scotland Yard, ask the shift supervisor for a meeting. He will refuse. Go outside and talk to the blind man who knows all the secrets of the Yard. Flattery will get you through the shift supervisor to Lestrade. Ask for permission and return to the morgue. Take the key and go to the crime scene. Open the door behind the theater, then the dresser. Take the tickets and go to the opera. Show the tickets at the entrance and talk to the manager. Go up the stairs to the balcony. Show the older lady the tickets and ask about Anna Carroway. Before the show starts, ask her for a recommendation for the manager, ordering the wardrobe for Anna. Armed with a note, you can enter the wardrobe with the manager. However, he won't let you touch anything. Go out to the hall, discuss tactics with Watson, and re-enter. Let Watson know, and he will take the manager aside. Open the desk drawers and take the bunch of keys from the middle one.
Visit the dog, Toby. Old Sherman is very willing to lend you his favorite. Trusty Toby will sniff out the area around the docks. Take the rope. Open the shed and take the hammer. Discuss with Watson. Push the barrel under the door and take the bucket from the window. Push the barrel back. Pick up the rag, soak it in the bucket, and wipe the window. Warn Watson of the attack and break the rotten door with the hammer. You will catch Blackwood, but the second person will escape.
Go to the prison. The guard won't let you in without a pass, which you must obtain at Scotland Yard. Talk to Blackwood and force him to reveal everything he knows. Go to the field in Kensington and talk to the coach until he finds the boy who met with Sara. When he starts squirming, show him the perfume. Ask about everything, then go to the dormitory. James will not be pleased because revealing his affair with the lady results in suspension from the team. When you inform him of the death, he will demand proof. The morgue will not issue a death certificate to a civilian, and there is no notary at hand. Go to Baker Street and ask the newsboy for yesterday's edition. Unfortunately, it's all sold out. Here Wiggins will help. Return to the dormitory, show James the newspaper, and he will point out where to look next.
Go to the billiard halls, where supposedly you can find Anna's friend, Antonio Caruso. Talk to everyone in the hall until Jock cracks and tells you where Antoni is. Go to the indicated address and talk to Mr. Caruso, who will give you Anna's new address.
Here knock on the door and use the doorbell. When the formalities are met, open the door with a bunch of keys. Inside, tilt one of the pots and sprinkle some soil on the carpet. Take both business cards from the table and go upstairs. Tell the old maid that there is dirt on the carpet downstairs. When she leaves, take the diary from under the statuette. Pay a visit to Farrthington's law office and talk to Mr. Jacob. Then go to the park and on the way, buy a gyroscope from Wiggins. Lord Brumwell's son plays here. Bully him with the toy when he approaches the fence, inquire about Anna. Give him the toy, take and examine the abandoned cap.
Go to Eddington Shop and talk to the pompous shopkeeper. By loudly discussing with the customers about counterfeit heraldic shields, you will force him to reveal Lord Brumwell's address. You will only be able to talk to Lord's wife at his estate, and you will be sent away empty-handed. Return to the prison and press Blackwood against the wall to reveal who he sold Sarah's necklace to. Go to the pawnshop and squeeze the information from the owner about to whom he sold the stolen jewelry. Go to the Moorehead & Gardner detective agency. The boss left at midnight yesterday for a mysterious rendezvous at the ZOO and has not returned yet. Investigate the situation on the spot. Gardner has been brutally murdered. Try not to engage in lengthy conversations with the police. Drop by the ZOO manager, Mr. Hollington, and ask about the lion keeper. Go to his apartment and present your version of events to him. Ask for help in retrieving the item from the lion's cage. Return to the ZOO and take the watch.
Go to the detective agency. Talk to the secretary. Break the window with a heavy typewriter, open the door, and enter the office. You will find a telegram about a meeting with someone named Robert Hunt at the railway station. Hunt is holding Moorehead hostage, trying to get Sarah's necklace. Before you can restrain him, he throws himself under a train. You can visit Hunt in prison, but he won't tell you anything significant.
Return to the detective agency. Move the chair and take the paper from the floor. Remove the books from the bottom shelf and open the safe using the code found in the watch. Take the necklace and remove the incriminating letter from it. Lord Brumwell, not Lady Brumwell, is revealed as the father of her son Anna Carroway. Leave the room, closing the doors with a key. Pull the sword hanging on the wall, which will release the latch on the painting. Behind the painting is an open safe with a key to the door. As you leave the estate, you witness Lord Brumwell's suicide, as he throws himself with a stone around his neck into the Thames.
Go to Robert Hunt's apartment. Flip through the small book on the bedside table and take the bookmark (which turns out to be a flower from the pawnshop). Go with the flower to the pawnshop to pick up the box with Tarot cards and a hidden key. Visit the fortune teller at the pub. The key will open the desk drawer. Inside, you'll find a silver key. Pull the sconce, and you'll open a secret compartment behind the wardrobe. Open the armored box with the key. Inside is a confirmation of paying for the rented apartment issued to Hunt. Go there as soon as possible. Look out the window and break the door with a steel rod. Watson will try to put out the fuse of the powder barrel; you solve and lead Anna Carroway out. Watson will save himself from the explosion. The three of you will go to the law office, where Anna will tell her story. Finally, in his room at 221 Baker Street, Holmes will connect all seemingly unrelated events and definitively close the case.